

Introduction
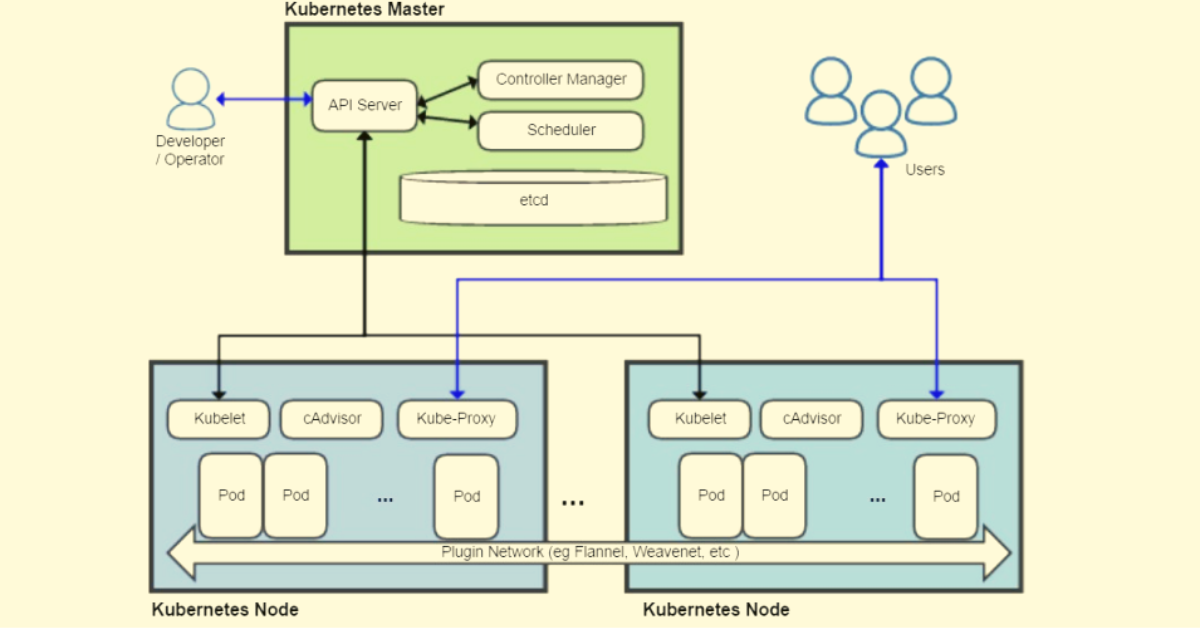
Kubernetes is a container-based open-source orchestrator that allows easier management and scaling of both containers and virtual machines. It can be used as a standalone system or in conjunction with other cloud providers’ offerings. Containers are lightweight, fast-moving, user-friendly systems that provide on-demand and pay-as-you-go developer flexibility. Kubernetes adds orchestration capabilities to the mix, simplifies operations by grouping related resources into logical groups known as pods, and does this dynamically.
Kubernetes is the hottest thing since sliced bread. It provides a way to manage many different components of your infrastructure all in one place, and you can use it with any cloud provider you choose. For example, you can spin up Kubernetes clusters on AWS.
In this article, we will learn the steps to deploy a simple master slave Kubernetes cluster on AWS using Ubuntu. We aim to simplify the deployment of master-slave Kubernetes clusters. This is an important feature of Kubernetes as it provides you an option to run your applications on top of Kubernetes and in the same time, manage them the same way you handle your Docker containers. We will handle all the Kubernetes related configuration changes via a single interface (Control Plane), taking into account your network setup and security best practices. A master-slave cluster is an arrangement that has a master node managing a set of client nodes.
The blog elucidates the steps to set up a Kubernetes cluster on the AWS cloud with the help of using Ubuntu as an OS. The Kubernetes cluster can be set up with 1 Master Node and 2 Worker Nodes. Creating such as architecture utilizes AWS EC2 instances and the architecture looks like the following:
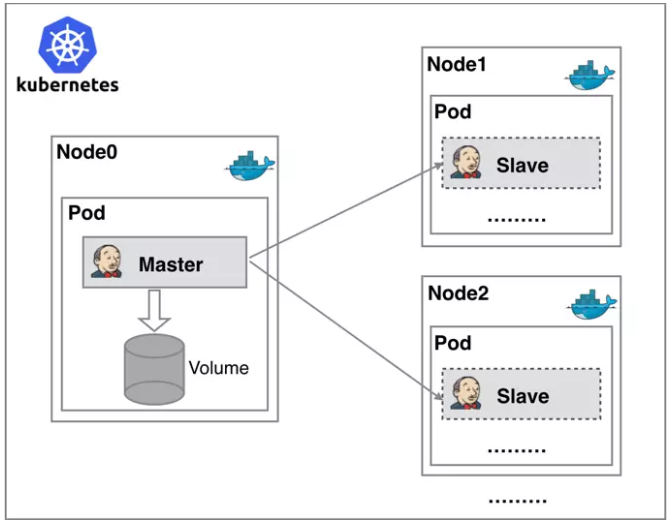
A Simple Kubernetes Master-Slave Architecture – 1 Master & 2 Nodes; Source – https://m.yisu.com/.
The master node is set up on Ubuntu 18.04 LTS Servers. One can leverage the “kubeadm” tool to set up the cluster. The tool is built to provide “kubeadm init” and “kubeadm join” for creating Kubernetes clusters.
Pre-Requisites
- 3 Ubuntu 18.04 servers with a minimum of 2 GBs RAM and 2 CPUs
- A system user having “sudo” access for each of the servers
Getting Started
Step 1: Create Instances
- The first step is to create 3 EC2 Ubuntu instances, one of the types t2.medium for master and another t2.micro for worker nodes. Once all three instances are available, the next step is to deploy kubeadm on all three instances
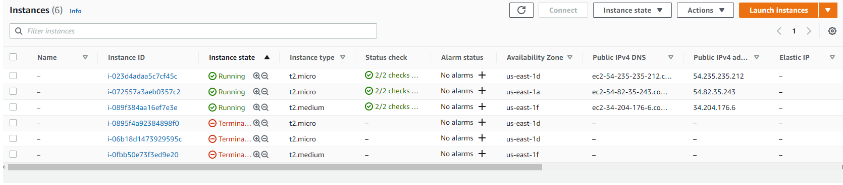
AWS EC2 Instances t2.micro for worker node
To start with three Ubuntu ec2 instances were given meaningful names i.e. k8-master, k8-worker-node1, and k8-worker-node2 using the command below:
- Sudo hostnamectl set-hostname “k8-master”
Once names are set for all EC2, we need to update the /etc/hosts file to include IPs to both the master and node architecture. The following content is updated:
34.204.176.6 k8s-master
54.82.35.243 k83-worker-node1
54.235.235.212 k8s-worker-node2
Step 2. Install Docker
In the second step, Docker needs to be installed on all three instances and the same needs to be verified. For this, the following set of commands needs to be executed:
To update packages:
- Sudo apt-get update
To install Docker:
- sudo apt-get install docker.io -y
Start Docker on the node using the following command:
- sudo systemctl enable docker
Verify if Docker Is installed using the following command:
- docker -version

This is how Docker Installation will be verified
Step 3: Install Kubeadm
Once docker gets installed the next step will be to install kubeadm
We also need to install a transparent HTTPS package to allow the clusters to communicate with each other:
- sudo apt-get install apt-transport-https curl -y
Add Kubernetes package repository key:
- wget https://packages.cloud.google.com/apt/doc/apt-key.gpg
- sudo apt-key add apt-key.gpg
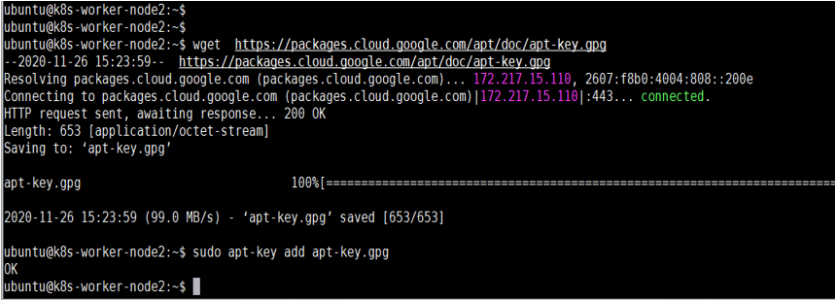
Screenshot of add apt-key
Disable swap temporary (as recommended):
- Sudo swapoff -a
To configure Kubernetes repository
- sudo apt-add-repository “deb http://apt.kubernetes.io/ kubernetes-xenial main”
Install Kubeadm package:
- sudo apt-get install kubeadm -y
Verify kubeadm installation:
- kubeadm version

Verifying the version of kubeadm
Step 4: Initialize Kubernetes
The next step of the Kubernetes cluster configuration is to initialize Kubernetes on the master node using the kubeadm init command.
Note: A minimum of two vCPUs are required for the master node and hence we should select t2.medium.
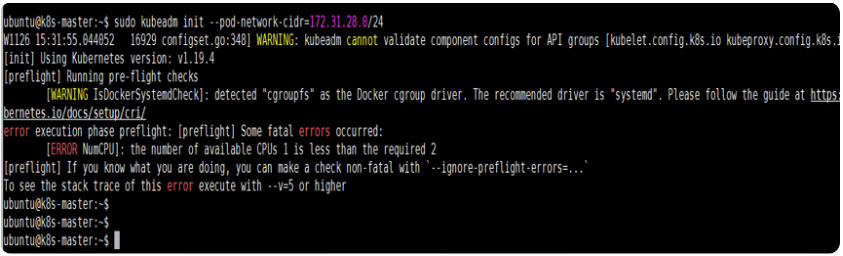
Error while initializing kubeadm on master when t2.micro was employed
After successful execution of the kubeadm init command, one can acquire all the information to configure the Kubernetes client as well as how the worker node can join the master node. This is how the worker node can join the master node.
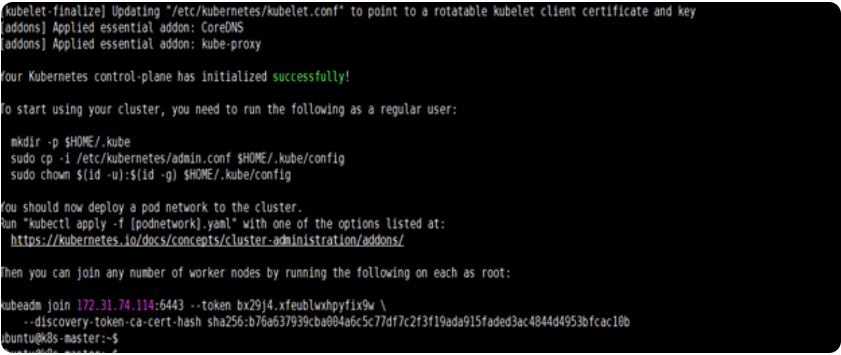
Initializing the kubeadm on master successfully after changing EC2 instance type t2.medium which has 2 CPUs.
Step 5: Set Up kubeconfig
To set up kubeconfig locally, execute the following command on master node:
mkdir -p $HOME/.kube
sudo cp -i /etc/kubernetes/admin.conf $HOME/.kube/config
sudo chown $(id -u):$(id -g) $HOME/.kube/config
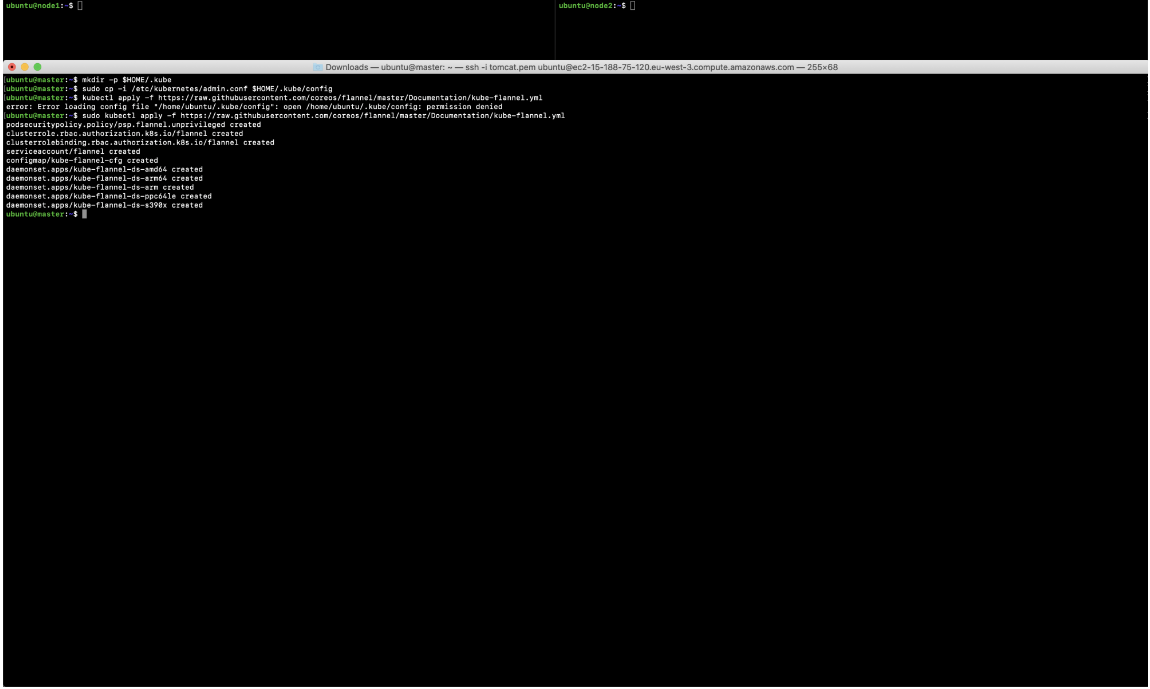
Step 6: Apply Flannel CNI network overlay by running the following command on the master node:
Step 7: Joining the worker nodes to form a cluster
After step 6, we must join the worker nodes to form a cluster by executing the following command on Node 1 and Node 2:
sudo kubeadm join 172.31.4.161:6443 –token 0y52t6.ffsj8jkjfcl1sq8h \
–discovery-token-ca-cert-hash sha256:7aa1825042d19d3e567f7e4b447634e942fe9ed7f18f78464a9c05f451551ed5

To verify that the worker nodes have joined the cluster successfully, the following command needs to be executed on the master node:
kubectl get nodes
This will get your simple multi-cluster Kubernetes architecture with one master and two nodes up and running:

Conclusion
In this blog post, we were able to set up a simple multi-cluster Kubernetes architecture with the help of kubeadm tool on AWS using Ubuntu as OS. Creating this architecture is very simple and can be easily done even by beginners.
A multi-cluster Kubernetes architecture definitely helps you manage and scale your workloads in better ways with minimal additional investments and no cloud vendor lock-in.
Kubernetes is leading the way to a better, more efficient, and secure IT environment. The Kubernetes Multi-Cluster architecture has been designed to create multiple isolated clusters that each have their own sets of resources, ensuring high availability and reliability. The multi-cluster architecture helps in creating highly available, self-healing, and elastic pods.
